living sculpture banner

tree archPlaying with Light: Temporary Lawn Patterns

Printable PDF version

Many artists today are playing with the ephemeral: work that doesn’t last, although it can be captured with photographs. Although we often like to create lasting works of art, sometimes it’s fun to 
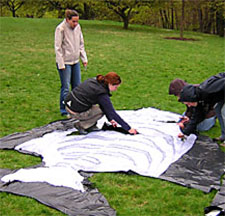
make a big, dramatic, yet fleeting splash. Using black plastic on a swath of lawn allows you to temporarily burn the color out of a lawn to reveal a yellowish pattern against a green background.

Objectives
  • Utilize lawn as a canvas to create a temporary work of art.
  • Calculate scale needed to blow up a paper-size drawing to a lawn-size pattern.
  • Learn how preventing light from reaching grass creates this effect.
  • Use your imagination!
Lawn patternsMaterials
  • A large area of lawn
  • Permission to use the lawn to create a temporary pattern
  • Paper and pencils
  • Tape measure
  • Scissors
  • Large roll of black plastic
  • Ground staples are ideal - or, pieces of wood, stone, or other objects to hold down the plastic

Lawn patternsTime Required
Planning: depending on group and project, anywhere from a half hour to an hour and a half.

Creating pattern: 1-4 hours depending on the complexity of your design

Directions
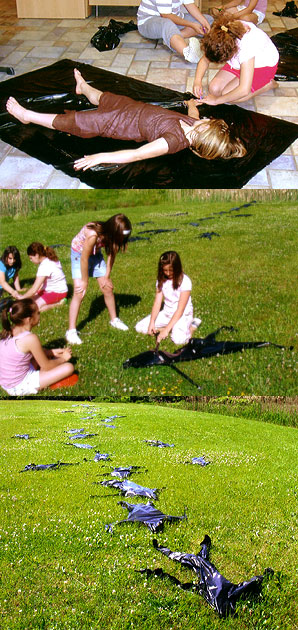
This technique deprives grass of light, which will change its color to pale shades of green, yellow, white, or rippled effects of a combination of these. When deprived of light, chlorophyll, which gives leaves their green color, fails to function. When leaves don’t produce chlorophyll they lose their green color. As long as you don’t leave your black plastic down too long, your design will indeed be fleeting with grass regaining its color within a few days. Checking a corner of one piece of plastic will be necessary to prevent the lawn from being killed; the length of time required to create a pattern will vary greatly depending on climate, sunlight, and temperature. It make take a day or a week.
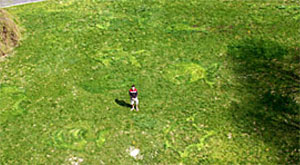
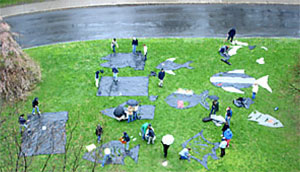
Cutting and staking lawn pattern

As a background planning step for this effort, you may want to find a site at which the design can be viewed from a height. For example, a park lawn adjacent to a tall building is ideal. Planning an opening celebration for when the design is “revealed” can be an exciting element of the project.

  1. Brainstorm, doodle, and decide on a pattern or design. Simple is good in this situation as you won’t be able to obtain a lot of detail in the shapes that you produce.
  2. Once you have your pattern determined, measure the area of lawn you have to work with.
  3. Compare your lawn area to your design to calculate how large your shapes need to be. Also consider the space between your shapes and how they will fit on the lawn.
  4. Cut the shapes out of the black plastic.
  5. Make sure you have a few hands to help as you spread your black plastic shapes on the lawn. This is best done on a still, calm day without wind!
  6. Anchor with ground staples or other objects as you go along. Make sure as little light as possible can penetrate the black plastic. Secure carefully to ensure that if it becomes windy, the plastic won’t lift.
  7. Check daily, particularly during hot, dry, sunny weather. If the weather is particularly cool and rainy, it will take considerably longer to create a pattern. On average, in weather that isn’t extreme it may take several days to achieve a noticeable pattern.
  8. Check out your design from different angles or heights to get the full effect. You may be surprised at how interesting this looks from, for example, the 4th floor of a building!
Remember to take a few photos as your pattern won’t last long.

Going further…
Approach your local art museum about their willingness to host this activity. Many art museum educators are eager for unique approaches to their programs, and a living piece of art may be a very compelling project. A little planning around the weather is all that would be necessary to convene a workshop, create the activity, and then offer an art event at which the design is revealed.

Printable PDF version