Making Crosses
Planting Seeds & Making Selections
Grape Breeding Program Information
"Click" on each image to see an enlarged version.
Authored by: Bruce I. Reisch and Philip Stewart, 2001.

Making Crosses
|
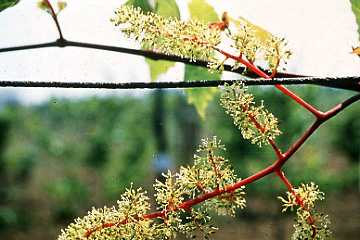
Male variety in flower |
Step 1: Pollen Collection If the variety to be used as a male happens to be in flower at the same time as the female (in grape breeding lingo, they "nick"), then this step can be easily accomplished by collecting a few of the flowering clusters for pollen. However, differences in timing require other approaches. If the male is significantly earlier, it may become necessary to collect and store pollen. This can be done by drying the clusters (1-2 days) and shaking out the pollen onto a sheet of glass or other smooth surface, then collecting it into a vial by scraping the glass with a razor blade. If, however, the male flowers after the female, then the pollen must be collected, dried, and stored in the freezer (at -20 C / 0 F) and the cross made next year. Stored pollen usually remains viable, but it is often not as effective as fresh pollen. Another option where the male flowers before the female is to reverse the cross - use the male as a female and use the female as a male. This only works if both parents have perfect flowers. |
|
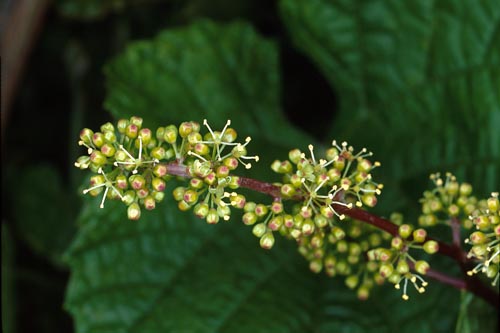
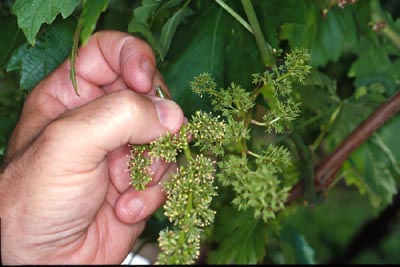
Cluster beginning to flower
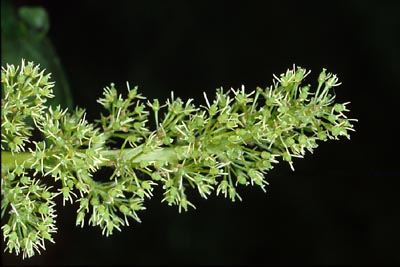
Removal of the "cap" for emasculation
Emasculated flower cluster |
Step 2: Preparing the Female Each flower cluster on a grapevine may hold from dozens to hundreds of individual flowers. All steps described here must be applied to every flower on clusters chosen for pollination. The guiding principle in preparing female flowers is to prevent accidental pollination before the application of pollen from the selected male parent. Before the flowers open, each one is covered by a cap, short for calyptra. Though this cap eventually dries and comes off on its own, it must be removed a day or two before the cross is to be made to prevent self-pollination with perfect-flowered varieties. In most cases, the anthers can, with some care and practice, be removed at the same time as the calyptra, using forceps with very fine tips. This practice is called emasculation. After the cluster has been emasculated, you must wait one to four days before proceeding (more time in cool weather and less time in warm weather) so that the female parts of the flower mature further and attain peak receptivity. This is often indicated by the appearance of a bead of moisture on the stigma. During this time, the cluster is covered with a bag to prevent fertilization by external pollen sources. If the female variety produces female (imperfect) flowers, no emasculation is necessary. The flowers are covered with a paper bag until they are ready for pollen application. |
|
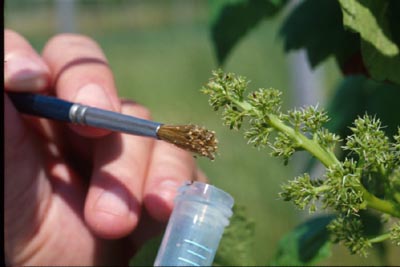
Pollination with an entire cluster
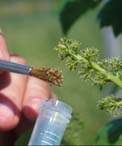
Applying stored pollen with a brush |
Step 3: Making the Cross Crossing is often simply a matter of brushing the pollen onto stigmas of the emasculated cluster. If both parents are flowering simultaneously, the pollen-bearing cluster can be gently brushed against the emasculated female. However, if pollen was collected earlier and stored, application with a soft paint brush is recommended. Care must be taken to sterilize the brush (and your hands) with 70% ethanol between pollinations. After pollen has been thoroughly applied to a cluster, taking care to brush every flower, the paper bag is replaced over the cluster, both to prevent fertilization by other pollen sources, and to protect the developing fruit from birds and the elements. The bags also help to identify the cluster locations at harvest time, at which time the seeds are removed from the individual berries. |

| <--back |
All material Copyright © Bruce I. Reisch, 2001